<Youngs bitter>
A customer on a recent training course asked if how he could create a view that didn’t display dates, but rather showed the day number from the project start date, that each task started on.
Depending on whether you want to include working days or not, the formula is different; for example, assuming the project starts on the Monday, does a task that starts on the following Monday start on day 6 (6th working day) or day 8 (the 8th calendar day).
Obviously, there are two separate sections to this’;
1. Create the formula
2. Create the view within MSProject for printing.
The formula basically needs to determine the difference in number of days from the project start date to the task start date for each task. The following formula does that quite nicely for working days….
| int(ProjDateDiff([Project Start],[Start])/[Minutes Per Day])+1 |
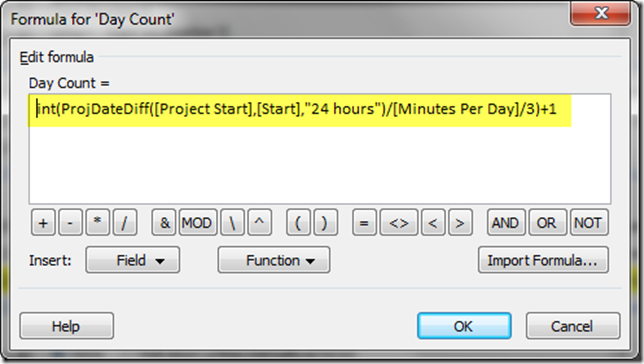
For calendar days, the formula is a little more complex
| int(ProjDateDiff([Project Start],[Start],”24 hours”)/[Minutes Per Day]/3)+1 |
In order to set this up, open up MSProject. I’ve used one of the standard templates for this demo.
Edit one of the number fields to contain the above formula and place the field next to the Task name.
Also, you’ll need to change the timescale to remove the dates, (assuming you are using the calendar formula rather than working days, otherwise the day count and the timescale aren’t in synch. Project has a built in Label field for this…
So, putting this together produces the following. Note that I’ve expanded the timescale within the Gantt so that you can see the day numbers correctly, ideally you would adjust it to get the whole Gantt on a single page before you print it off.
And of course, if you print this off it looks like the following… It’s an easy way to communicate a plan before you commit to dates (ie you are selling something!). And here’s a tip, if you can’t work out the paper sizes, just print it to A0 to an Adobe printer, and then print it physically onto A3/A4 – you’ll get everything on one page.
Enjoy, Ben.


