<flat white (again)>
Using Row Level Security to Auto Filter your Power BI Reports
Without a doubt I think Power BI is one of the greatest tools Microsoft has released in the last few years, it truly has revolutionised and democratised data (oh no, I’m beginning to sound like a Microsoft employee). What I really meant to say is that it’s made accessing Project Online data really easy for all users (as long as they have the correct licence).
However, one of the issues that occurs with the OData feed is that there is no security trimming, so that means as a Project Manager I have the potential to see all projects and related information in a report; depending on your organisation this may or may not be a desirable outcome. The historic way around this has been to produce separate reports for each Project Manager, restricting the data by way of a report level filter, but this is time consuming and complex in terms of reports management.
Introducing Row Level Security and Dynamic Filtering
Row Level Security (RLS) has been in Power BI for some time now, but it’s only in the last few months that I’ve thought about using it in a dynamic way to restrict the data that PMs can see* only the projects that they have published. So what does RLS do? Well simply put it filters the rows in a dataset by way of a DAX expression. For an overview of RLS please review this link.
Setting up RLS
RLS is setup and configured in both Power BI Desktop and in the Power BI Service. Note that each user must have a Power BI Professional licence to utilise RLS. The moving parts are
- Filters
- Roles
- Users/Groups
Filters
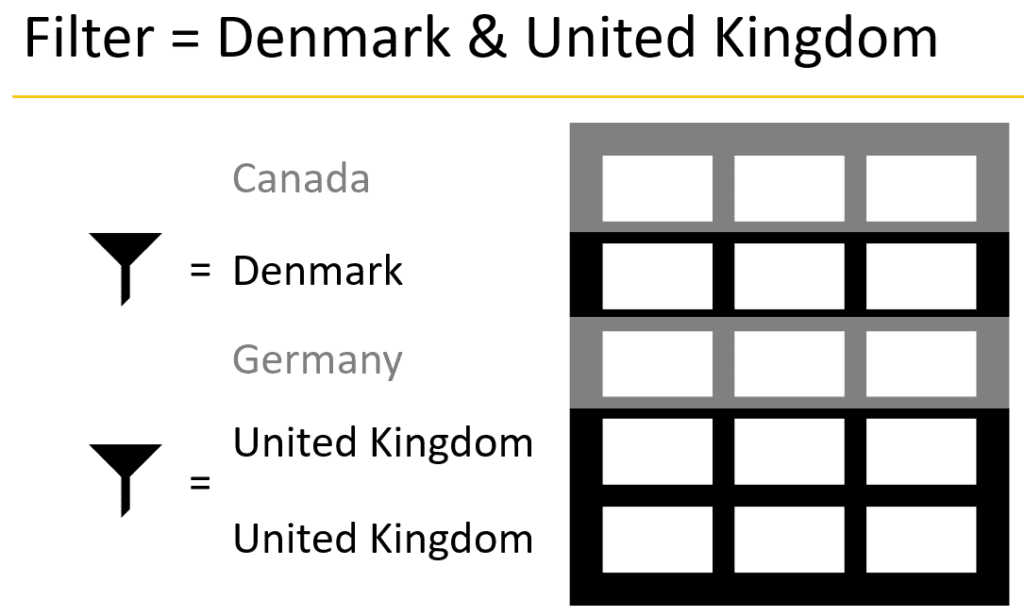
Put simply, a filter is associated with a role, and filters the dataset just to show the records that match the filter. When a user views a report in the Power BI Service, any appropriate filters are applied based upon the Role(s) that the user has been assigned to. The image below shows a filter applied to a dataset where “country = Denmark or country = United Kingdom”, and because we hard code the country names in the filter, we term this static filter. We can see the results of this filter in the image below.
A dynamic filter checks the user name of the current user, and filters the dataset based upon the username. The image below shows the dynamic filter applied and returning rows 1 and 4 of the dataset to the user. In this case, the filter would be “email = UserPrincipalName()” where UserPrincipalName() returns the fully qualified name of the user, eg micky@acme.co.uk

Dynamic filter applied based upon the user account
Roles
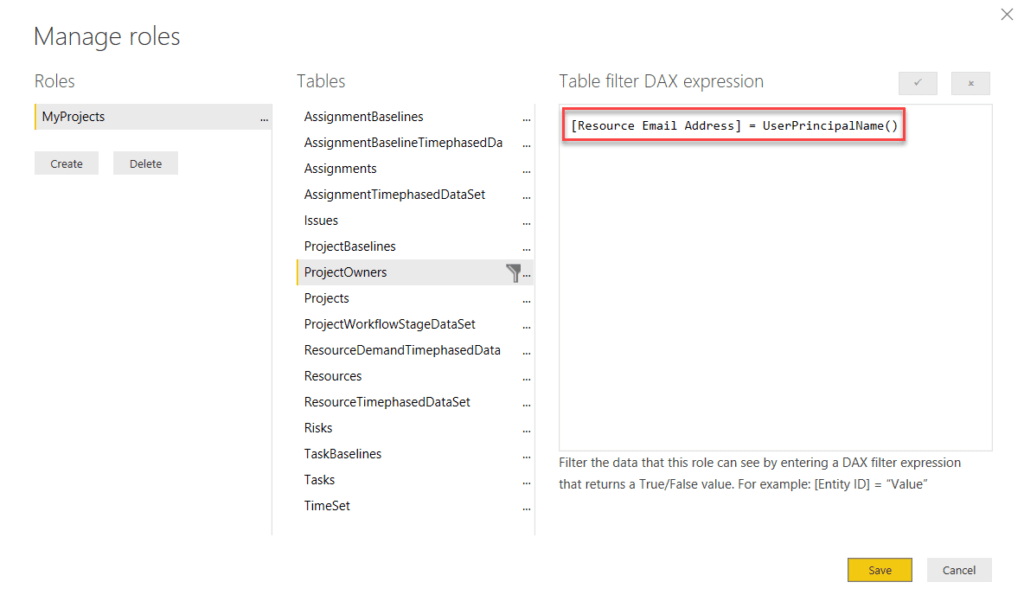
A Role is associated with one or more filters, and so for a static filter I could create a role such as Danish Sales, and associate the filter “country = Denmark” with the role. For a Role such as My Projects, I could create the filter “email = UserPrincipalName()”
Users/Groups
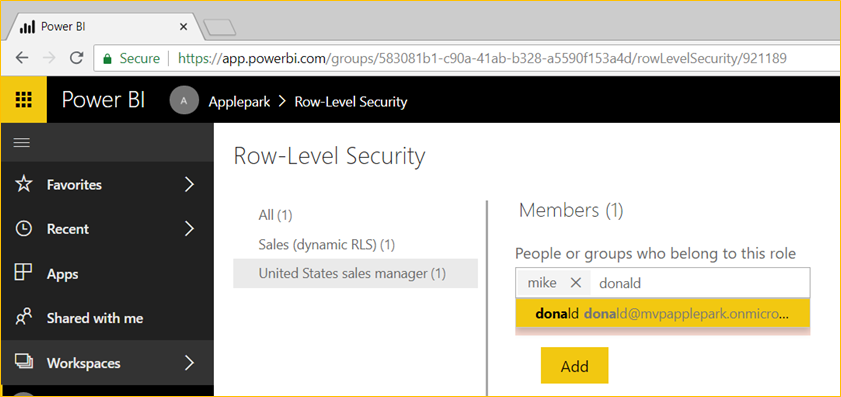
Once the Roles have been created, users or groups can be added to the role. Whereas Filters and Roles are created in the Power BI Desktop, the addition of users/groups to those roles is done in the Power BI Service.
Setting up a Dynamic Filter for Project Online data
Download an existing Power BI template or report
Now that I’ve explained a little bit about RLS, let’s have a look at setting this up and to do that I’m going to use one of my Power BI templates available from the TechNet gallery.
- Download the template here and connect it to your Project Online tenant.
You can view details of using the Power BI template here.
Create a table containing the user’s email address
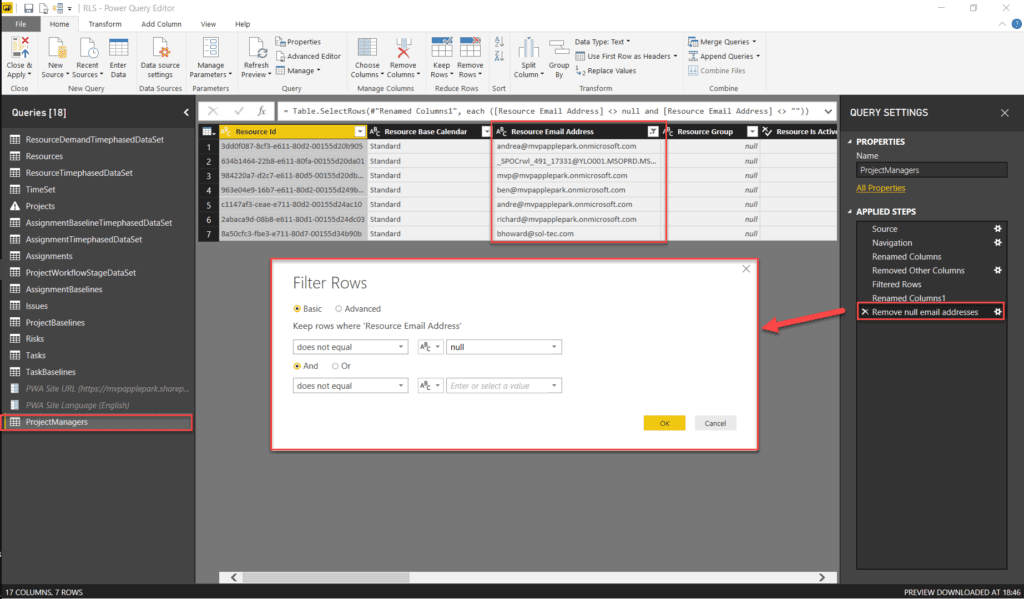
This is pretty simple for us in the Project Online world because the resources table already contains all the email addresses of our resources. I’ve chosen to duplicate this table and then filter out resources that don’t have a valid email address. I’ve then renamed the table “ProjectOwners” and created a 1 to many relationship between it and the Projects table. This is a simple solution but does mean that our PM also have to be named resources in our Project Online implementation, something which typically happens anyway. If this isn’t the case in your Project Online Deployment then you will have to think of another solution in order to reference the email addresses in a table.
Setup the Role and Filter
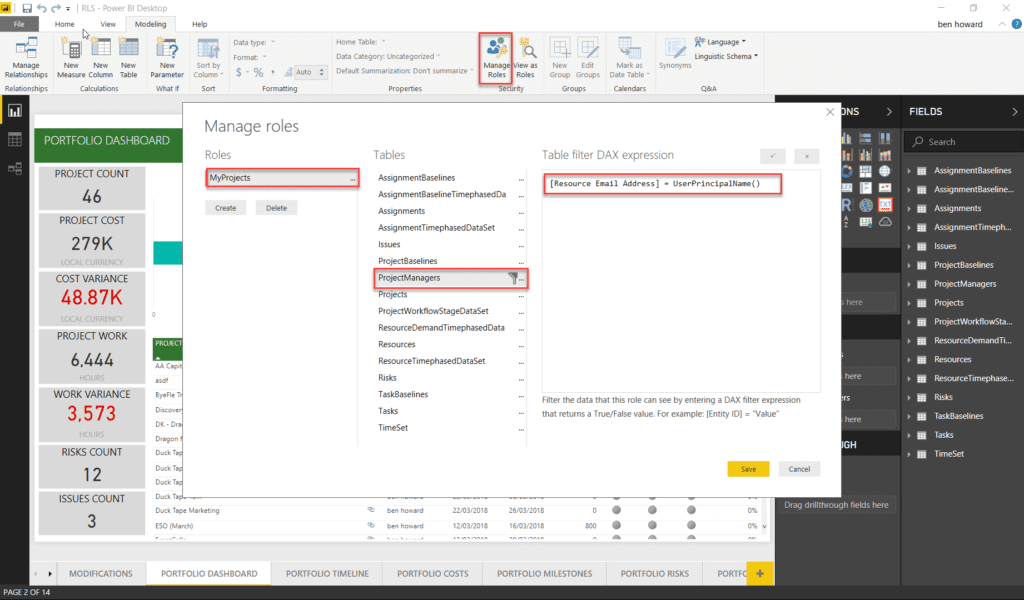
In Power BI desktop, click on the Modelling tab and create a new Role. The actual name doesn’t matter too much, I’ve called my MyProjects and used the filter [Resource Email Address] = UserPrincipalName() within the ProjectOwners table.
It is possible and indeed desirable to test the filter by using the View as Role button – note that you have to select both the role name and enter in the user’s email address.
Publish the Power BI model
The roles and filters are part of the Power BI model, and hence the Power BI model needs to be published after the roles and filters have been created in the desktop.
Add Users/Groups to the Roles
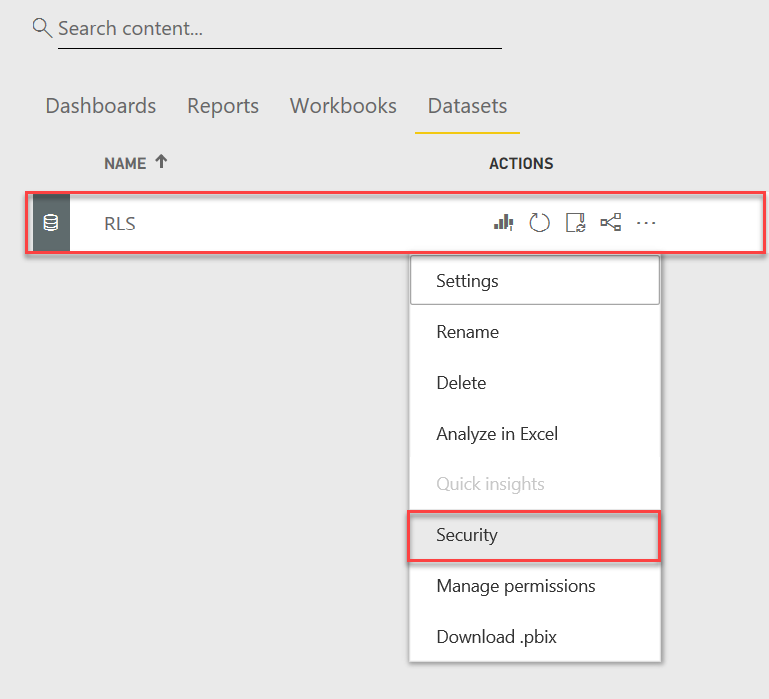
Once the report has been published, then select the security option for the dataset. In our case I’ve created a security group called “All Project Managers” and added all of my PMs into that group.

Share the Report with the “All Project Managers” Group
It isn’t sufficient just to add the users/groups to the roles, the report also needs to be shared with the group, otherwise the individual users won’t be able to see the report. Once this is done, then we’re good to go. Note that in this case I have an “All Project Managers” group.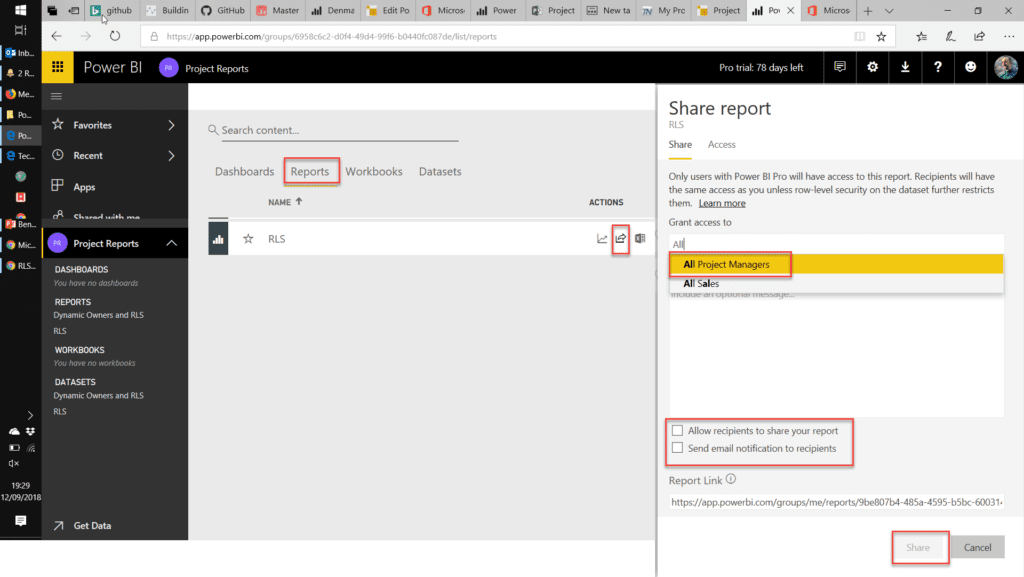
Testing the process works
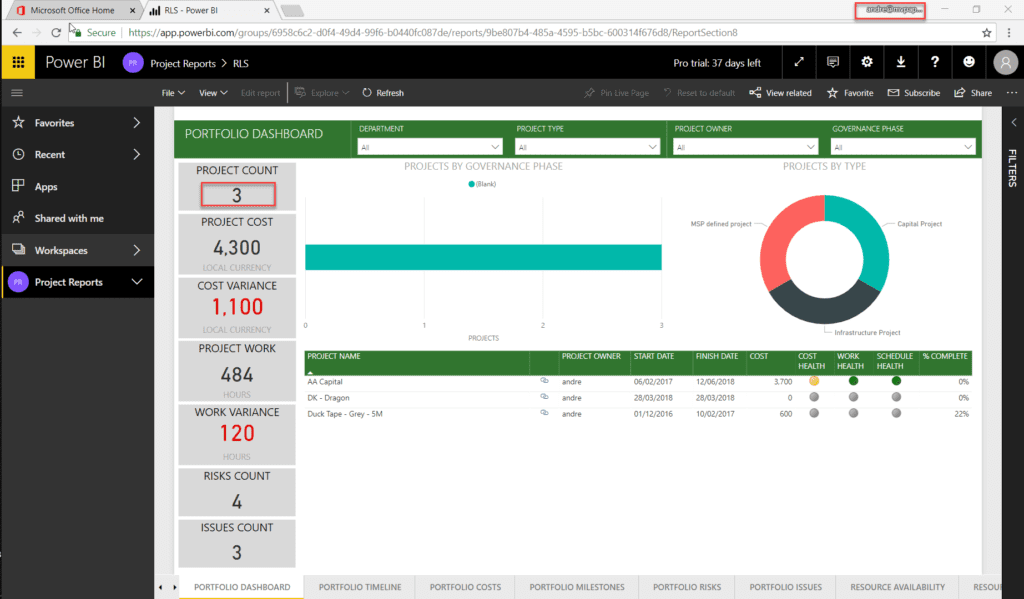
Ask one of your PMs to access the report, and they should only see data pertaining to the projects that they own. If not, then chances are you’ve shared the report and allowed them to edit it thereby bypassing the RLS filtering process, or you’ve not setup the group correctly. Note that Andre can only see the three projects he owns, because the report has filtered on his user name.
The Power BI template file with the ProjectOwners table can be found here, and the accompanying video can be found here – please remember you can subscribe to my blogs at the bottom of this page.
Good luck, Ben
* Please note that in order to access the OData feed (aka the Project Reporting Service) you need to have the appropriate licence, this isn’t typically available to Project Managers. Please check with your organisation or partner regarding Project Online licencing, as I take no responsibility for it within this blog.