<Flat white>
Modifying Microsoft’s #ProjectOnline #PowerBI Content Pack to Support Your Language
This article shows you how to modify Microsoft’s standard Project Online Content Pack to support additional languages.
Content Pack Overview
If you are using Project Online (PJO) then you are probably using the OData feed for reporting purposes, the two most common options being to bring the data into Excel or Power BI. Both applications have their pros and cons, though one of the big advantages with Power BI is that Microsoft have provided a pre-defined content pack for the last few years, and even better, we’ve been able to directly access it and modify it for our own purposes. For information on how to get hold of MS’ Content Pack please see Brian Smith’s post here.
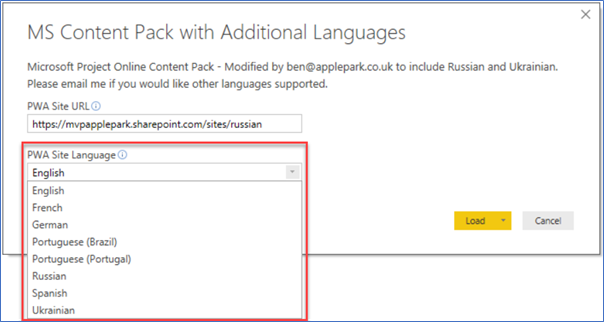
However, one of the issues with Microsoft’s original content pack was that it only supported US-English, so if your PWA instance was created in a different language then the content pack would simply not work for you. Microsoft listened to its customers and have recently updated the content pack to support five additional languages, namely French, German, Portuguese (Brazil), Portuguese (Portugal) and Spanish. Whilst Microsoft’s update of the content pack is to be welcomed it still leaves many other international customers without the ability to natively use the content pack; this became plainly obvious when I was in the Ukraine recently presenting at Kyiv with my fellow MVP Oleksiy Prosnitskyy. Following on from my time with Oleksiy and some of the Microsoft personnel in the Ukraine and Russia I decided to update the content pack with language support for both Ukrainian and Russian, so if you use my content pack then you choose either of these two additional languages too.
Download the Existing Content Pack
To download Microsoft’s content pack with the additional languages of Ukrainian and Russian, please follow this link. I’ll be using this content pack to show you how you can add your own language, though if you’d like my help with this please just email me and I’ll ensure it is added to my published content pack so that it can benefit everyone.
Modifying the Content Pack to Work with Another Language
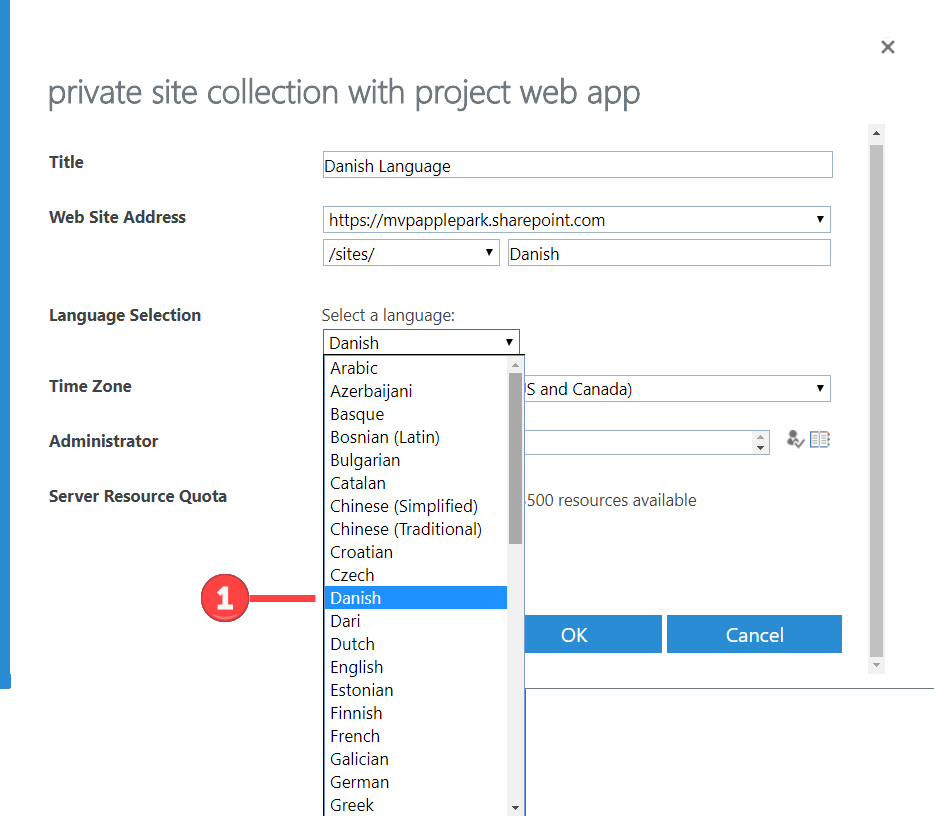
When you create your PWA instance, you are prompted to select the language. Given that I’ve been working in Copenhagen recently, I figured Danish would be great addition to my content pack, so by the time you read this, Danish will have been added! You can follow this process to add your own language.
Create a New PWA instance for your language
- The first thing I’m going to do is create a new PWA instance in the language I want to use the content pack against, in this case Danish.
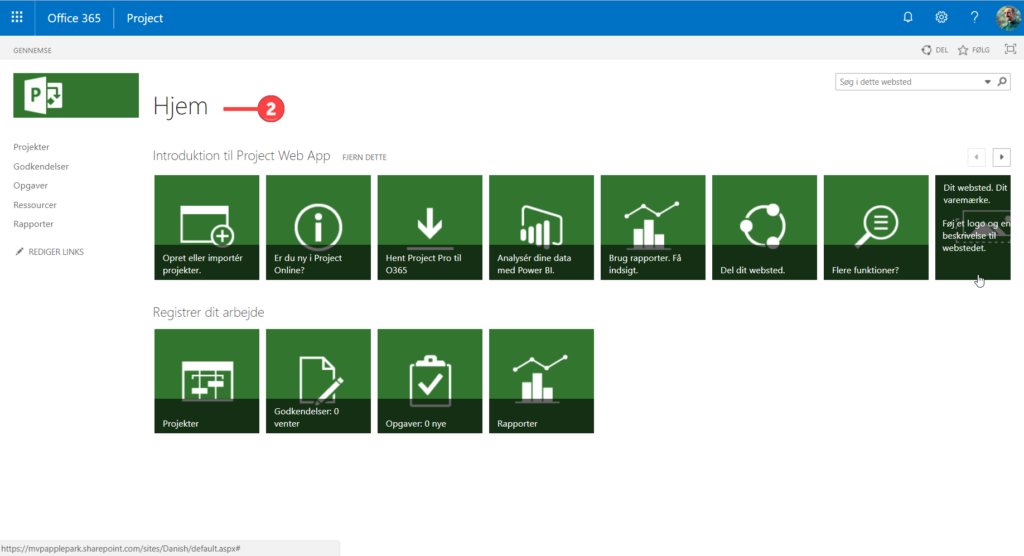
- The site is created and displays in Danish.
Connect the Existing Content Pack to the New Instance
Next it’s a question of connecting our existing content pack to the new instance to see what errors we get.
- Open my existing content pack template file and connect if to the new instance
- Set the PWA Site Language as English
- Click on the Load button.
Review the Existing Errors
- Unsurprisingly when the Content Pack tries to load the data I get some errors.

What’s happening here is that some of the column names that the Content Pack expects aren’t available because they’re in Danish. Our job is to determine the correct translations for these Danish terms and translate them back to English. Now I don’t speak any Danish, but once you know your way around Power Query it’s pretty easy to make the translations and modify the query to support Danish. Not only that, but both https://translate.google.com/ and https://www.bing.com/translator do a pretty good job of telling you what’s what! I’ve supplied a table below which defines which items are typically translated.
Use the Query Editor to fix the errors
Using the Query Editor, it is possible to identify and fix all the issues.
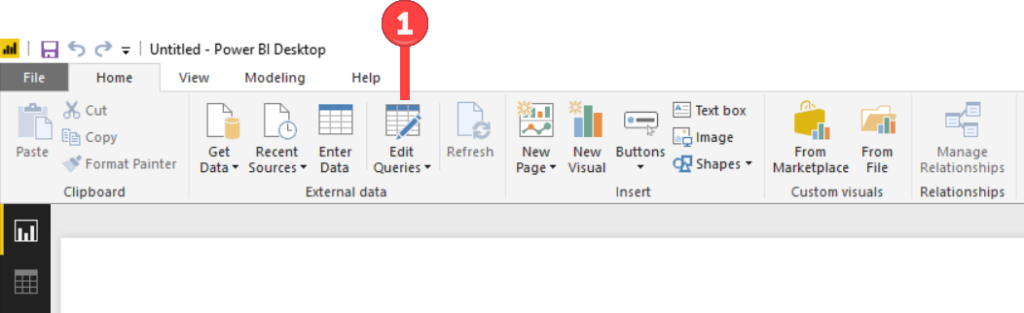
- Open the Query Editor in Power BI by selecting the Edit Queries button.
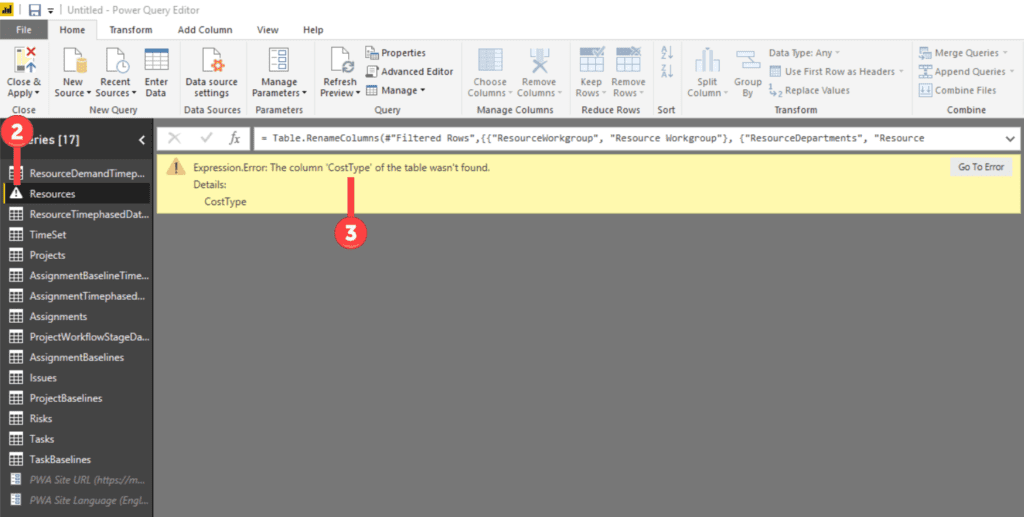
- Review the first error; you can immediately see the Query that has an error because of the icon with the exclamation mark to the right of the Query Name.
- Review the error and note the column name. In this case the column that is causing the issue is called ‘CostType’
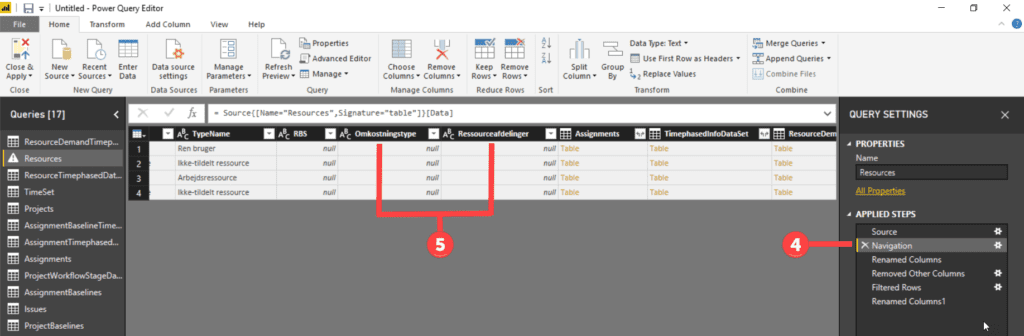
- Click on the Navigation step within the Applied Steps
- Then scroll through the table to see the column headings and identify the headings that aren’t in English – in this case I can see I have two columns called Omkostningstype and Ressourceafdelinger – somehow I suspect these might be the source of my issue here.
Now it’s back to https://www.bing.com/translator and see which one matches CostType and it turns out to be Omkostningstype. Whilst I’m there I determine that Ressourceafdelinger translates to Resource Departments and note them in the table below.

Use the Advanced Editor to modify the Query
So I’ve got my two “rogue” fields and the translations for them, now I need to use the Advanced Editor to write some M-code to perform the translation. The term Advanced Editor is a bit of a non-statement, as the editor is anything but advanced.
- Click on the Advanced Editor button on the Ribbon.
- Review the M-code within the editor and identify the portion that deals with the Language Selections (under the section called Renamed Columns
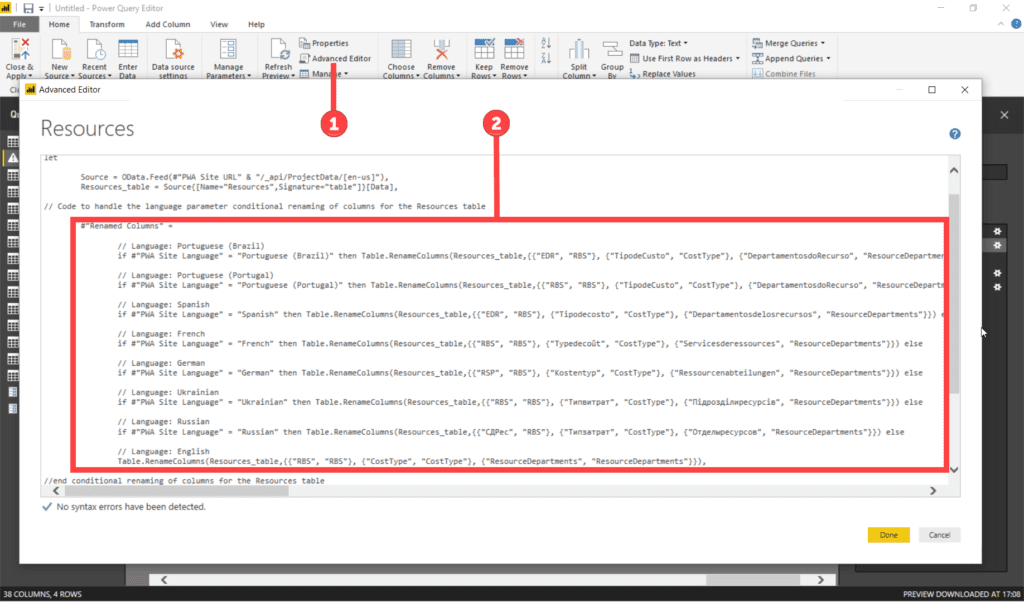
The portion of the M-code that we are interested in is the one that renames the columns based upon the language choice (in our case Danish – even though we haven’t yet set up Power BI to be able to select this language). At this stage I copy and paste all the M-code into another editor (erm, notepad!) and save it before making any other changes.
Cut and paste one of the other language lines (eg Portuguese (Brazil)), and change the references to match the language and translations, (I’ve highlighted them in bold below)
// Language: Danish
if #”PWA Site Language” = “Danish” then Table.RenameColumns(Resources_table,{ {“Omkostningstype“, “CostType”}, {“Ressourceafdelinger“, “ResourceDepartments”}}) else
- Paste the modified code back into the Advanced Editor
- Click Done to close the editor

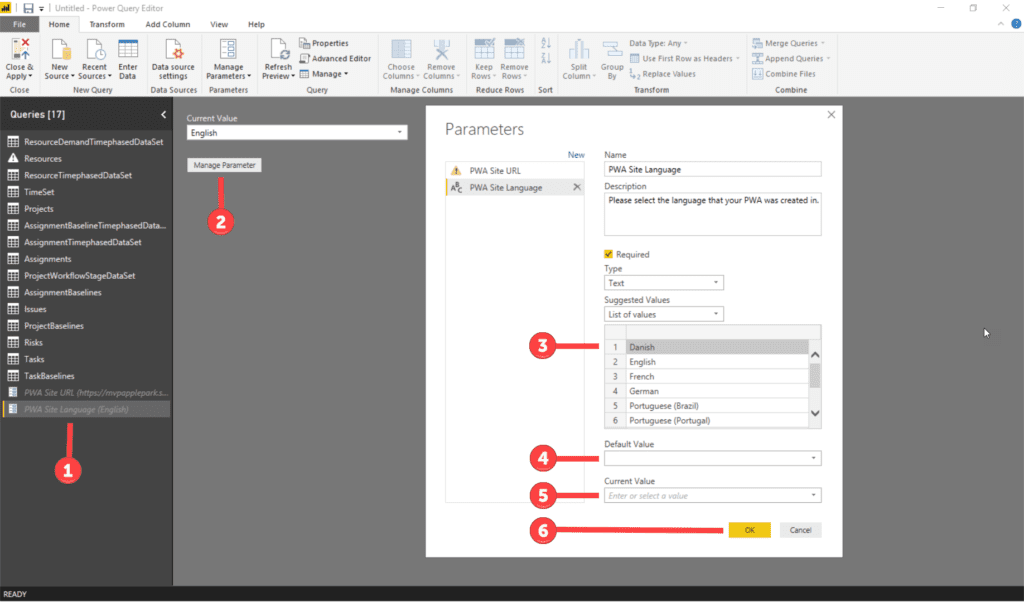
Add the new language to the Language Parameter List
To test that this initially works, we then need to be able to choose the Danish language, and so this needs to be inserted as one of the options within the Language Parameter.
- Select the PWA Site Language parameter
- Select the Manage Parameter button
- Within the dialog box enter the language name (Danish – this must match the language name you entered into the Advanced Editor). Note you can cut and paste multiple parameters here, which is useful if you (like me!) want to display the language selection in alphabetical order.
- Choose a default value if you wish
- Select your language (Danish) as the current value.
- Click OK
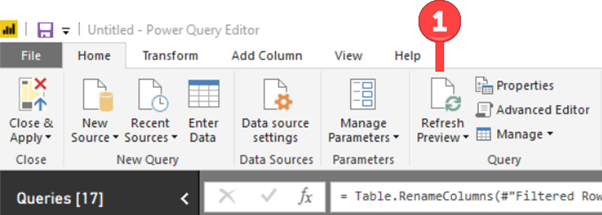
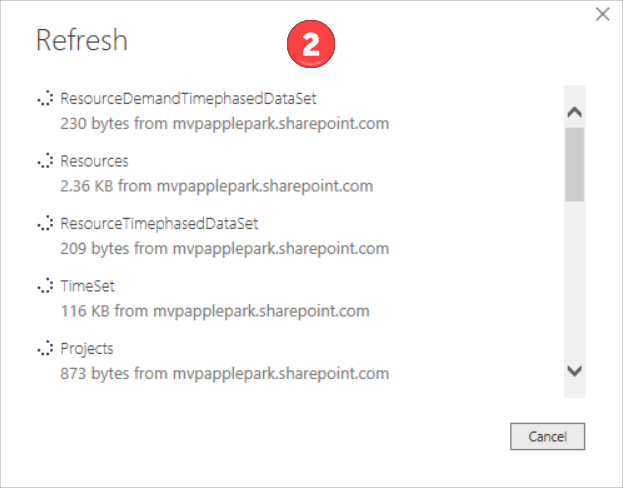
Refresh the Resources Query
Now you need to refresh the query, to test both the language parameter and your M-code. If all goes well then the Resource Query will run with no errors.
- Click on the on the Refresh Query button to refresh the Resources query.
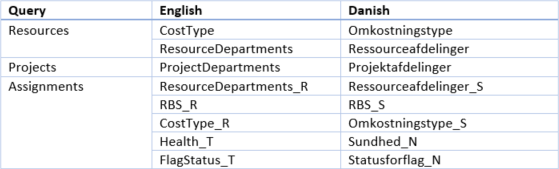
Iterate Through the Remaining Queries
It’s then a question of iterating the process for each of the other queries until you don’t get any errors. I’ve listed the queries and fields I needed to update to get the Content Pack to work with my Danish PWA instance.
Once that’s done, it’s a simple case of selecting the Close & Apply button within the Query Editor.
- Select the Close and Apply button within the Query Editor
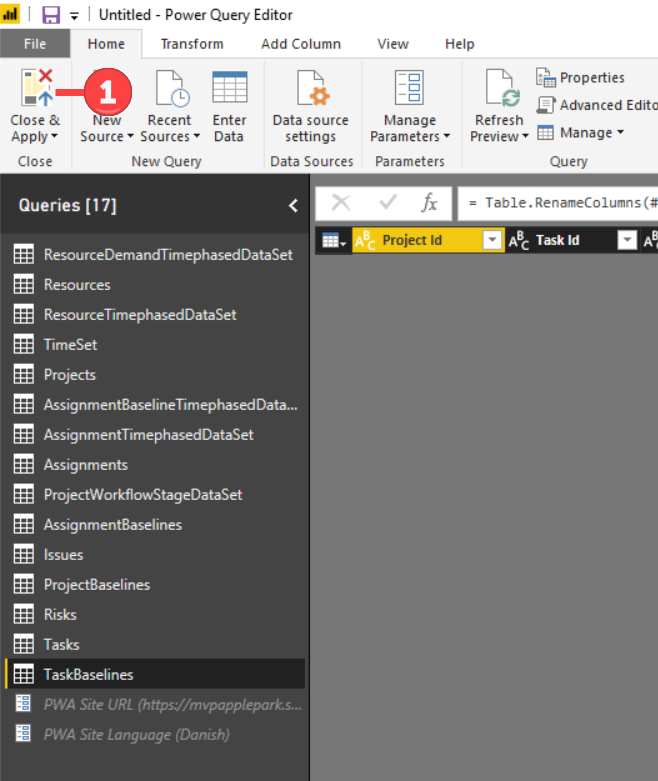
- The Power BI report will refresh, this time without any errors and you’ll be able to use the content pack to review your Project Online data.
Save the Content Pack as a Template for Future Use
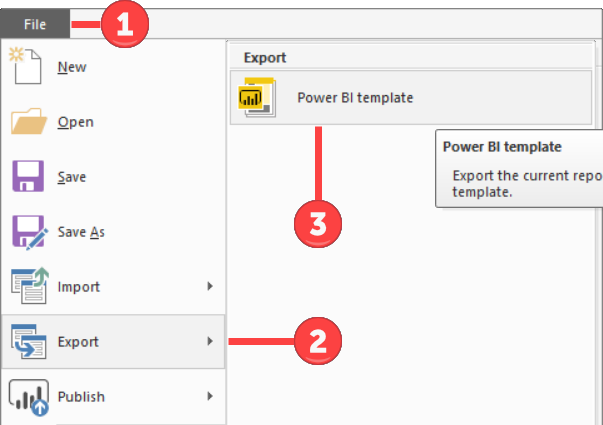
One final thing, if you want to re-use this pack, it’s worth saving it as a Power BI Template file, by using the File | Export button.
- Select the File button
- Click on the Export tab
- Click on the Power BI Template option
Open the Template to test it.
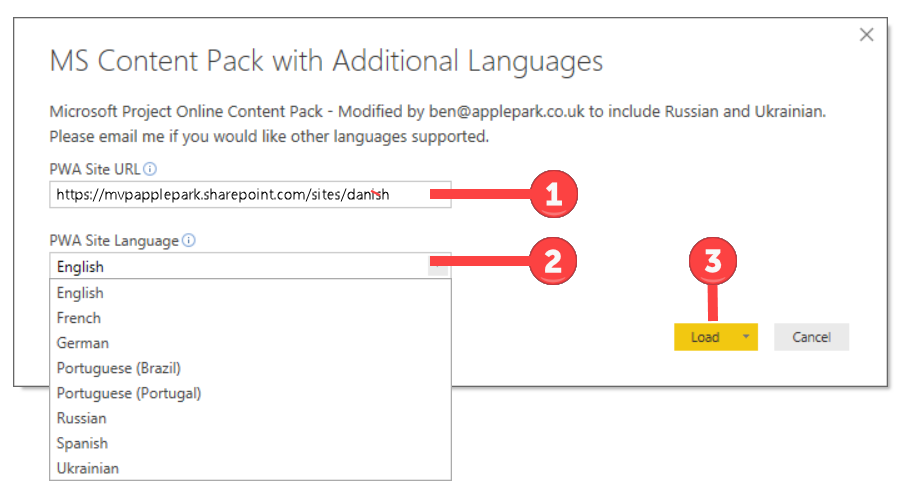
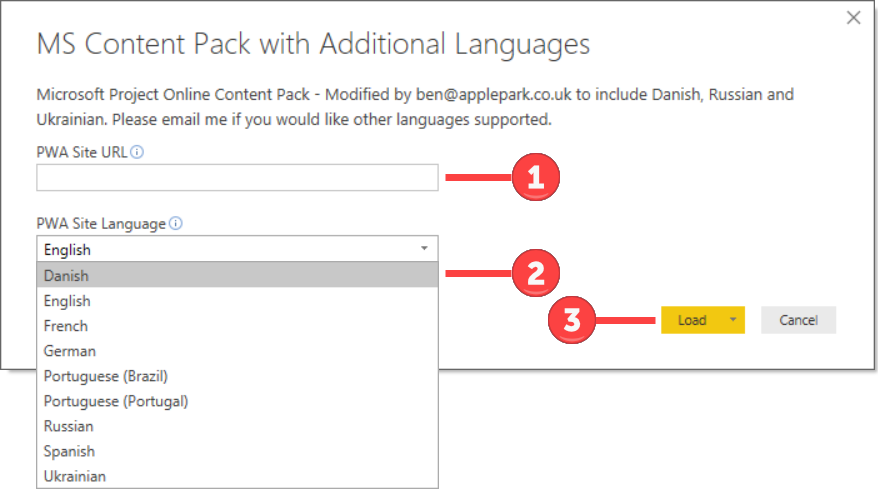
Once you’ve saved it as a Template file it will prompt you for the URL and Language when you next open it in Power BI. Now you can see we’ve got Danish as an option.
- Enter the PWA URL
- Choose the Language
- Click on Load
Summary
As you can see, Power BI is an extremely powerful tool when it comes to reporting, especially when you use the Query Editor to manipulate the base data. With a little effort and determination, you can utilise the Power BI content pack against any of the supported languages for PWA, and of course, you can extend the content pack to your heart’s content!
If you would like to read up further on this or any other topic, please review the following links.
MPUG – www.mpug.com
Blogs on Project – https://applepark.co.uk/ben-howard-blog
Project Downloads – https://applepark.co.uk/p2o
Technet Downloads – https://gallery.technet.microsoft.com/site/search?f%5B0%5D.Type=User&f%5B0%5D.Value=ben%20%20howard%20%5Bmvp%5D
Twitter – @ben_project
Enjoy, Ben.