<Update 10th September 2019>
The Power BI template now supports the Priority field, and an additional two tabs have been created, one to display the tasks by priority, and another with a buttons to switch easily between the status or priority views. As well as links to the template at the end of this post, a public view is available here.
<end of update>
Power BI has once again been consuming some of my spare time and I’ve been working on providing a reporting option for Planner. This post outlines how you can get started with the Power BI template.
The Power BI report has the following features
- The main page replicates the Charts feature from Planner.
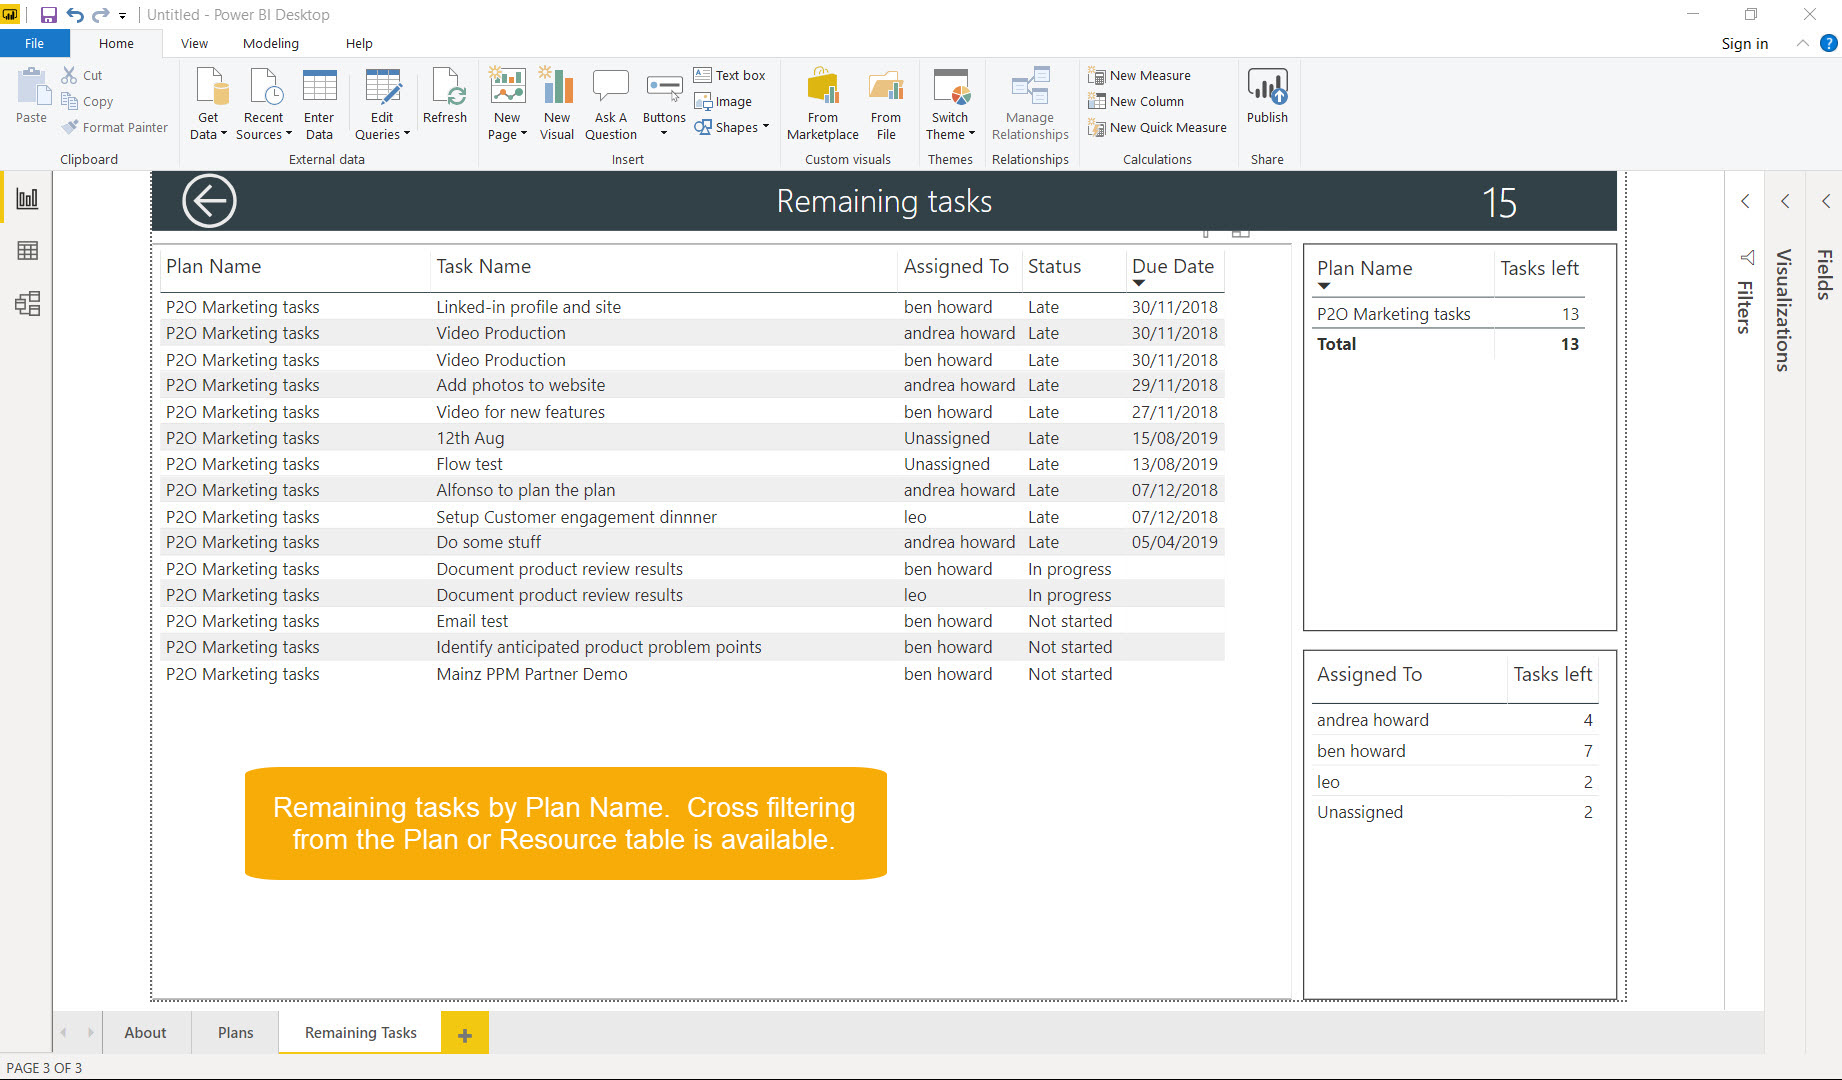
- Drill through capability by either Project or Resource detailing remaining task details
- Where two or more resources are assigned to a single task, each task is reported separately for each resource, allowing you to drill into the remaining tasks by each resource.
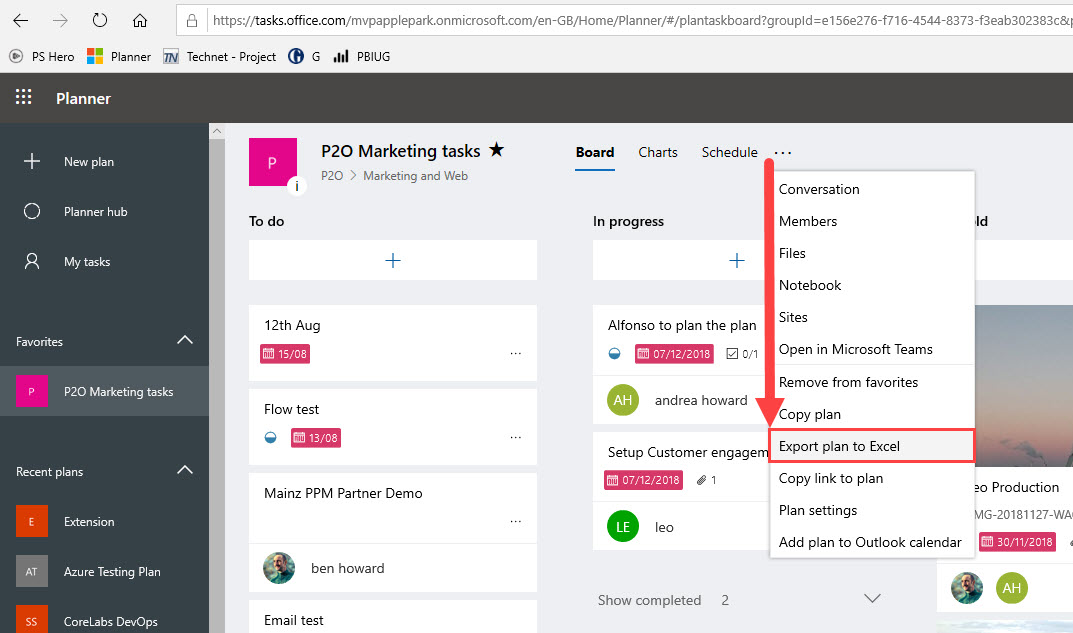
Export the Plans to Excel
The first job is to export your plan to Excel. Full details of this functionality can be found here. When you export the plans, make sure you place them all in the same folder, and of course, if you are exporting a file then make sure that you overwrite all existing exports of that plan, otherwise you will duplicate the tasks.
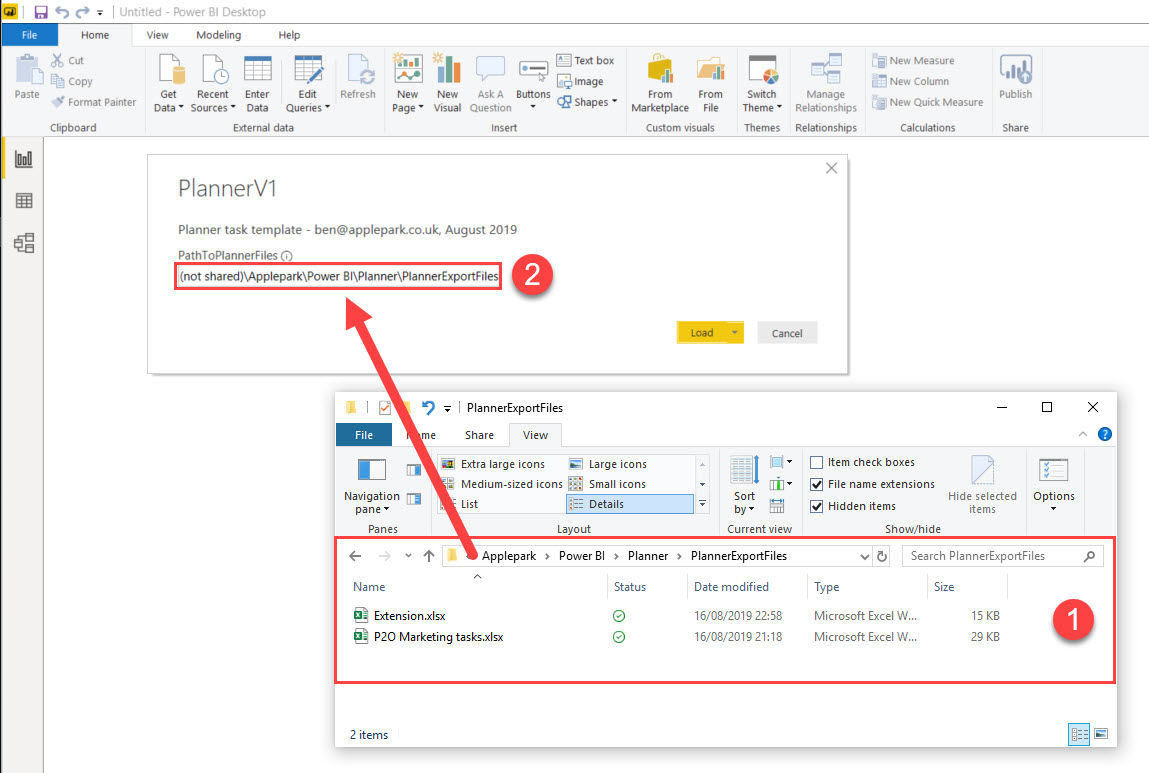
Open the Power BI template and enter the path to the Folder
Enter the path for the folder where you exported the Planner plans to. Note that Power BI will attempt to read all of the files in this folder, so make sure only exported Planner plans exist in this folder.
- Copy the path to the folder where you exported the plans to
- Enter the path into the Power BI template when you open it.
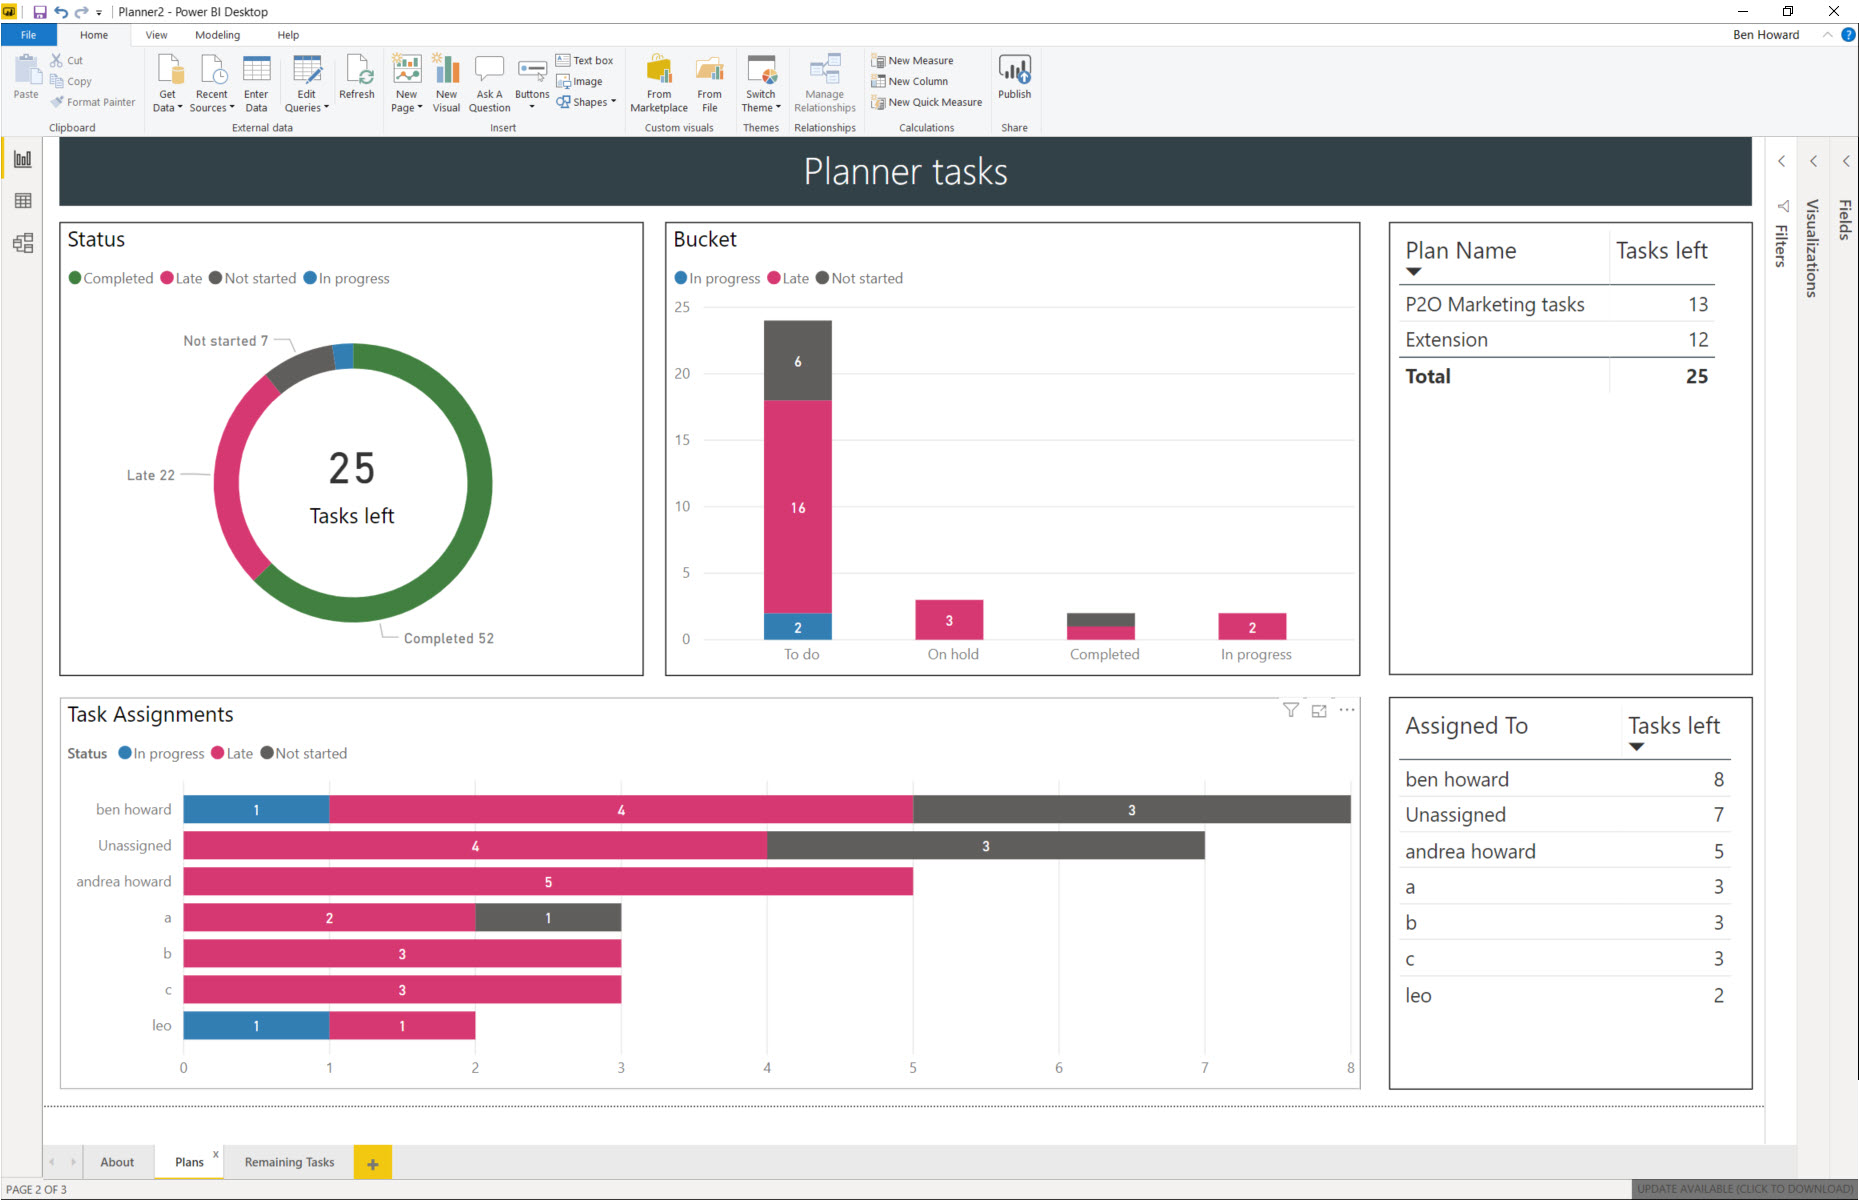
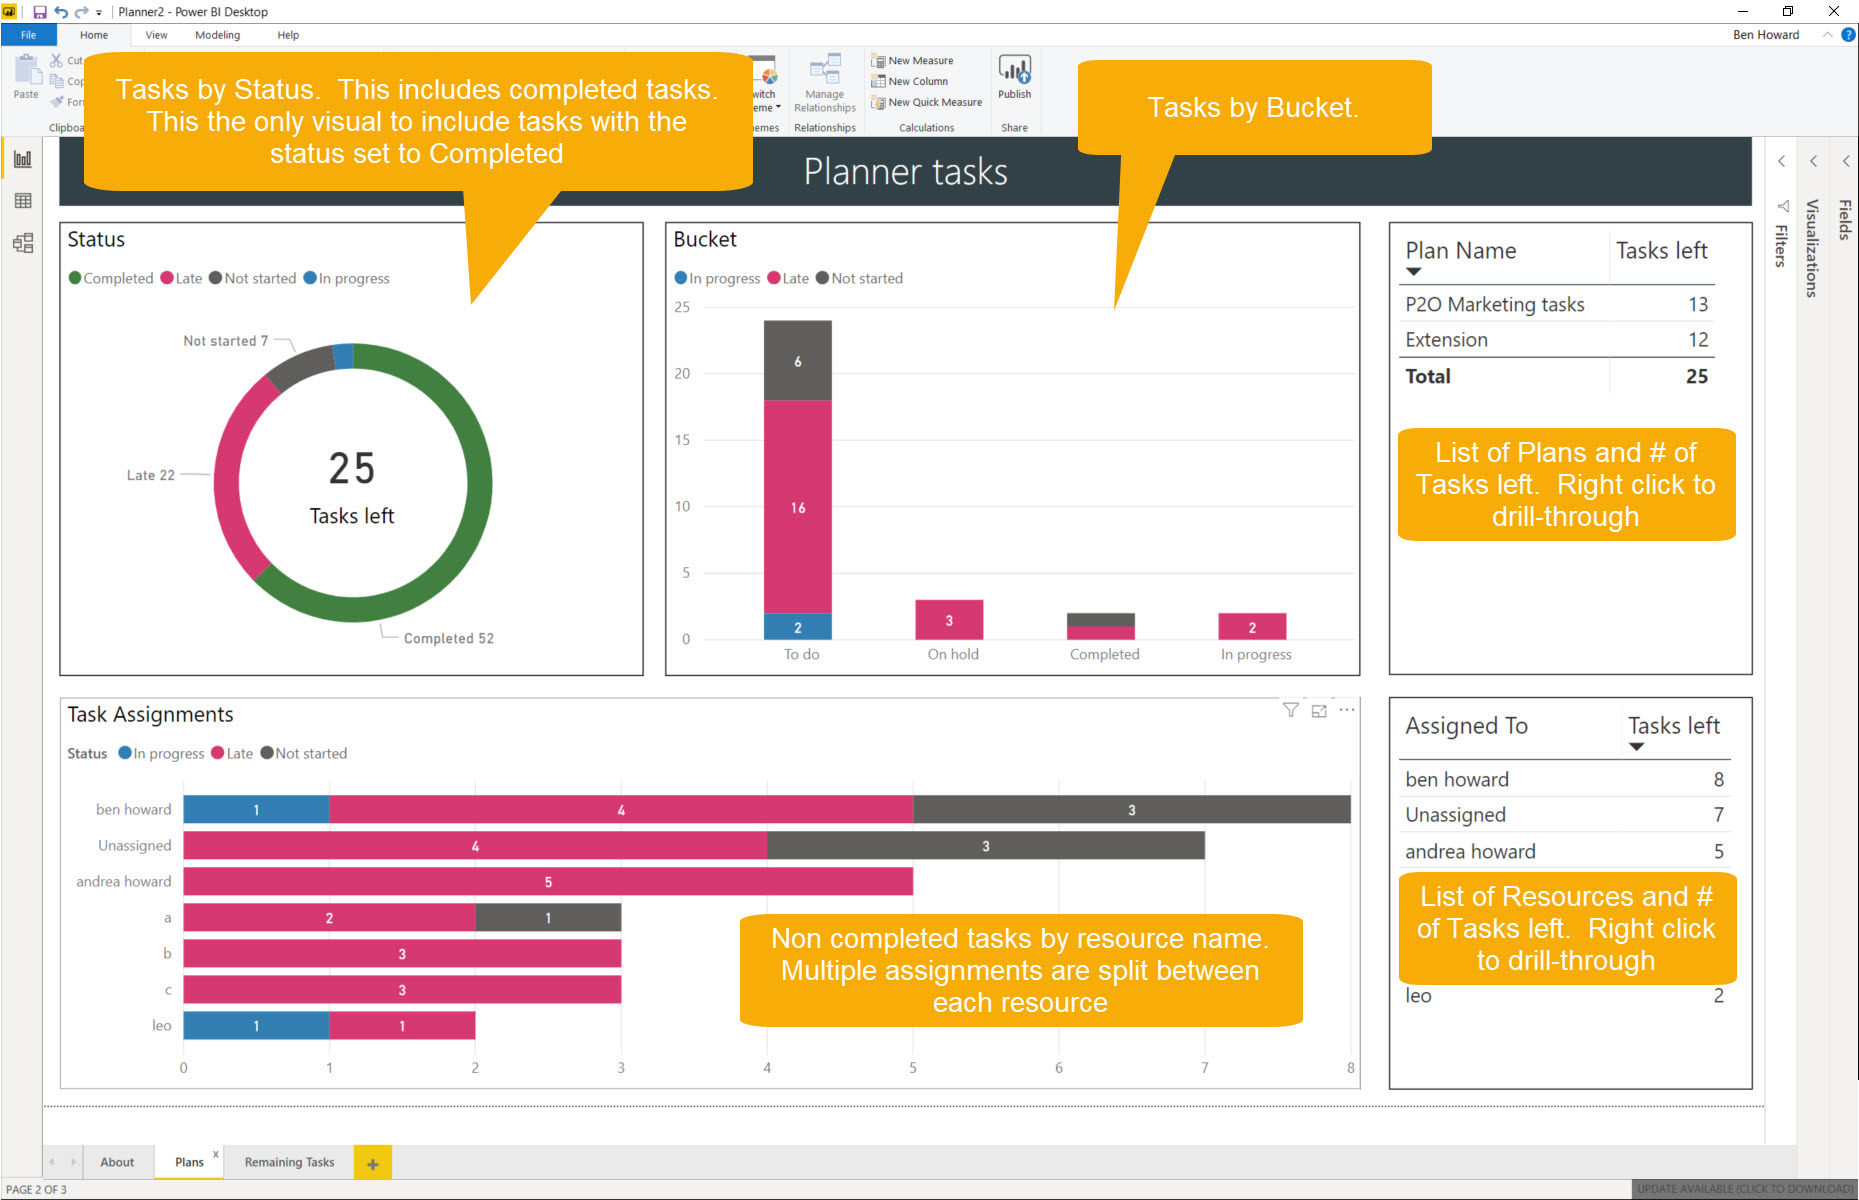
Planner Charts
The main page replicates the Charts feature in Planner and at this point it is worth a quick discussion regarding the Status field.
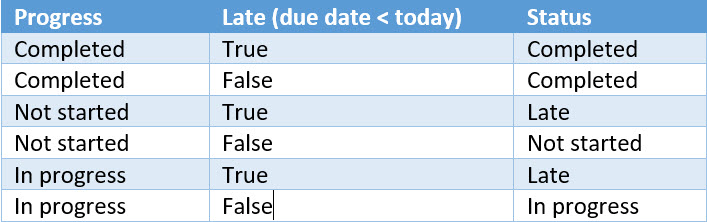
The Status field is set as either Completed, Late, Not started or In progress. The Completed, Not started or In progress fields are set by the user for each task (do not confuse this field with the buckets, adding a task to the In progress bucket does not set the status to In Progress). For non-completed tasks, Planner calculates whether a task is Late or not based upon its Due Date (if it has one). This can be summed up in the following table, where one of three progress inputs results in one of the four statuses depending upon the Late value.
The late value is calculated at export time, so it is imported to ensure that the files are exported in a timely manner.
The Plans tab
Once you understand the Status field then the Plans tab is fairly simple.
The Remaining Tasks tab
The aim of this tab is to provide more detail into the remaining tasks, specifically the name and who the resource(s) that are assigned to them.
The template is available here for you to download, and you can watch a YouTube video of everything here.
As usual, good luck with both Planner and Project/Project Server.
Ben.